Salesforce list views are a powerful reporting tool for you and your users. Create a set of standard list views to avoid repeat requests, or empower your users by teaching them to create bespoke list views, so they can grab and segment data at a moment’s notice.
At first glance, list views in Lightning are very similar to Classic, but when you delve a little deeper you’ll discover they have become far more intuitive and powerful.
Read on for your complete guide to Salesforce list views in Lightning.
Salesforce List Views: Table View
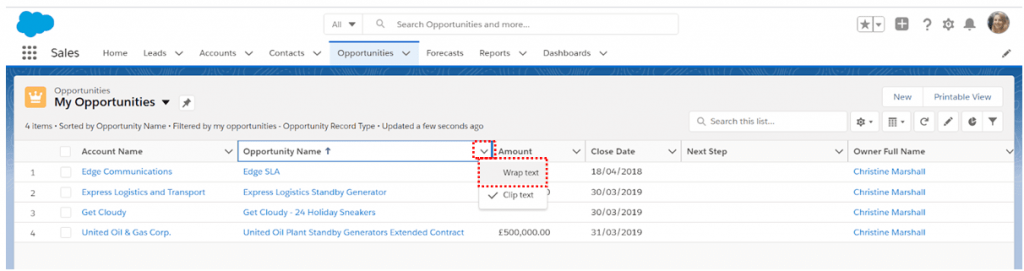
The default display option for Salesforce list views is “Table View”. Similar to a spreadsheet, the “Table View” display will allow you to easily view your data in rows, wrap text, and resize or sort by any column.
1. Click on the dropdown arrow next to a column and select “Wrap text” (particularly useful for fields such as Description or Next Steps)
2. Hover, then select the dividing line between columns to resize column width
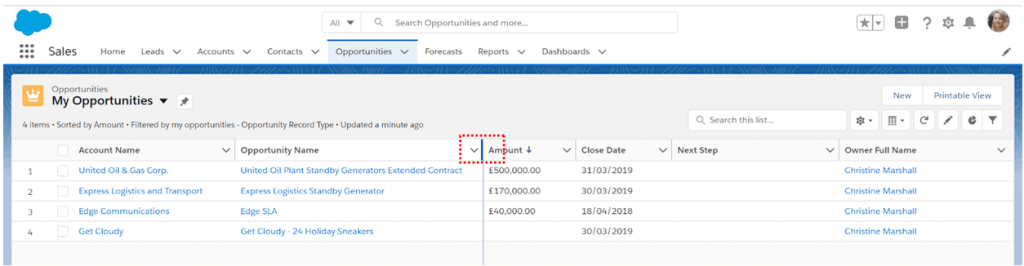
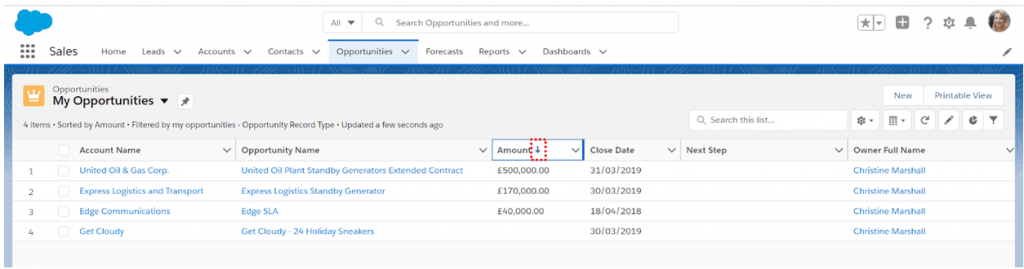
3. Click on any column to sort; click once to sort ascending and twice to sort descending
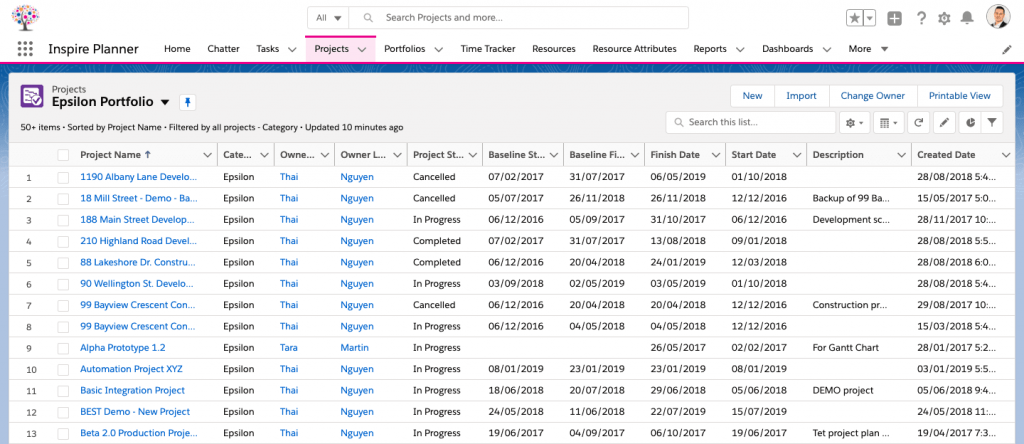
And since Inspire Planner is a 100% Salesforce-native project management app, it utilizes many native features including Salesforce List Views. This lets you track your projects and tasks, displaying the data you need to see.
Here is how you can display your Inspire Planner Projects in a Table view when you want to see more data at once:
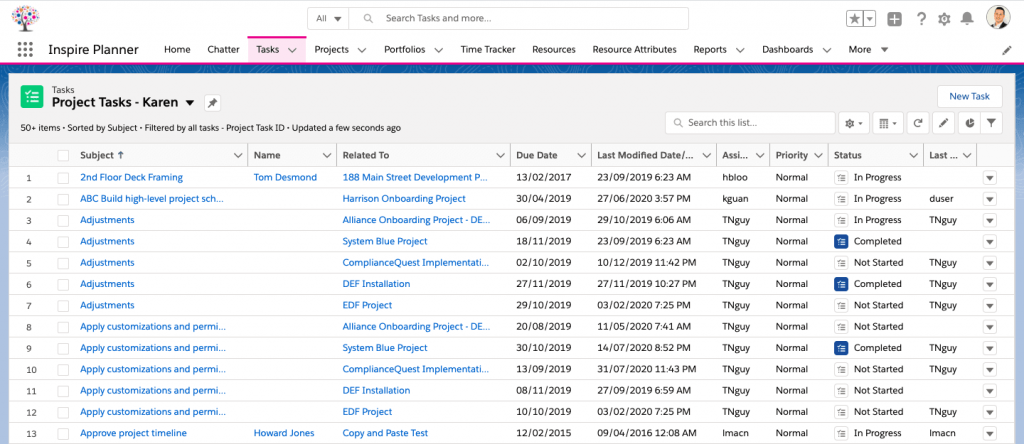
Inspire Planner also deeply integrates with standard Salesforce Tasks, so by going into your Tasks tab, you can also see all of your personal as well as Inspire Planner Project Tasks in a Table view:
Search Your List View
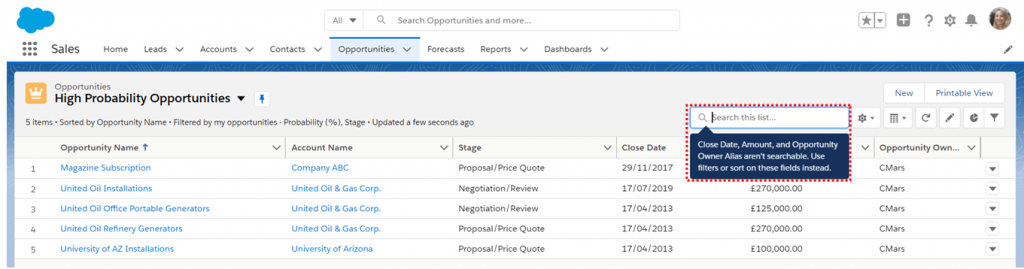
If your Salesforce list view is returning a lot of results you can search for an individual record using the list view search bar. Not all fields are searchable so be sure to keep an eye out for the tooltip advising you which fields are not available for your search!
1. The search bar tooltip will display any fields that are not searchable
Inline Edit
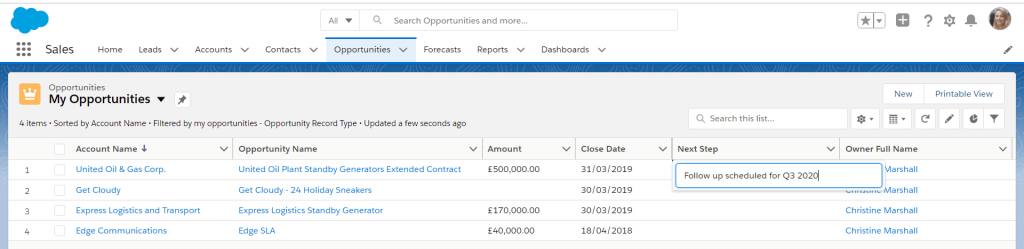
Instead of navigating to individual records, you can save time by updating your records directly from a list view.
1. Click into an editable field, enter or edit data, then hit enter or press Save
2. Update multiple records at once by selecting the records, choose your field, make any changes, then apply the changes to multiple items
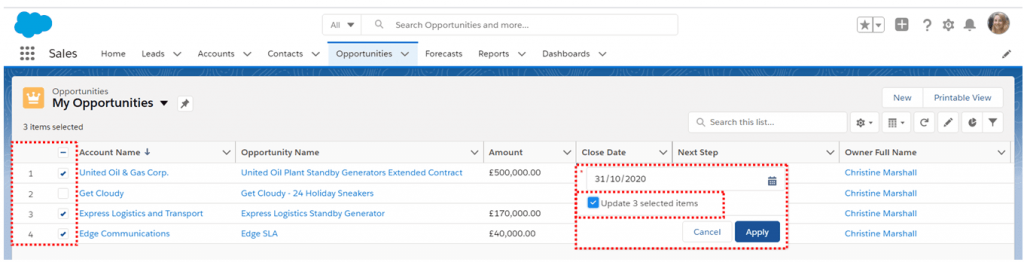
If you use Record Types, Salesforce list views will need to be filtered on a single Record Type before you are able to inline edit. It’s also worth noting that not all fields are editable from a list view; check out this article to troubleshoot common issues with inline editing.
Adding Charts
You can create a chart to accompany your Salesforce list view, choosing from vertical bar, horizontal bar, and donut. Charts are a great way of visualizing and understanding your data and can be toggled on and off by clicking the chart icon. Charts are not supported when you open the “Recently Viewed” list view.
1. Select your list view
2. Click the chart icon to select a default chart
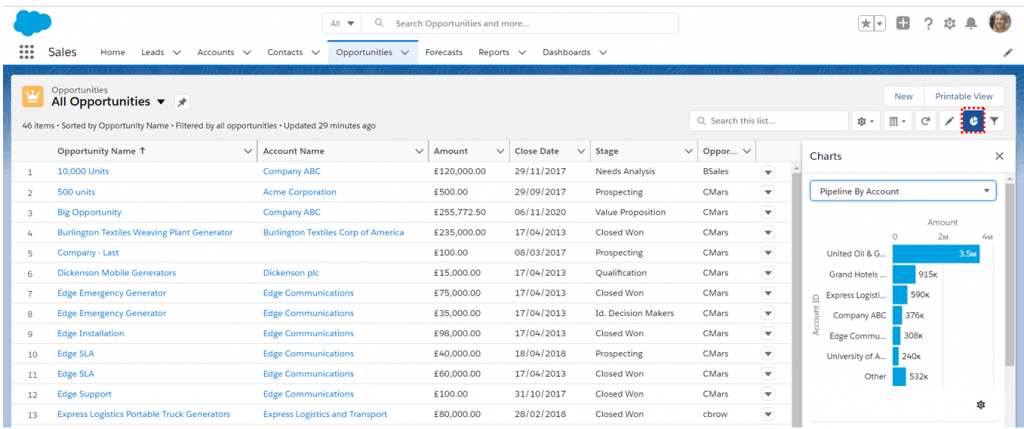
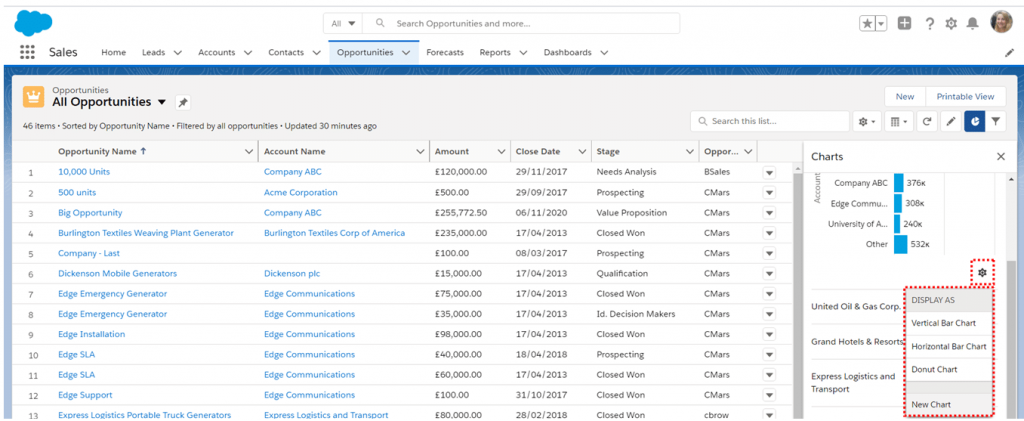
3. Click the gear icon to change the chart type or create a new chart
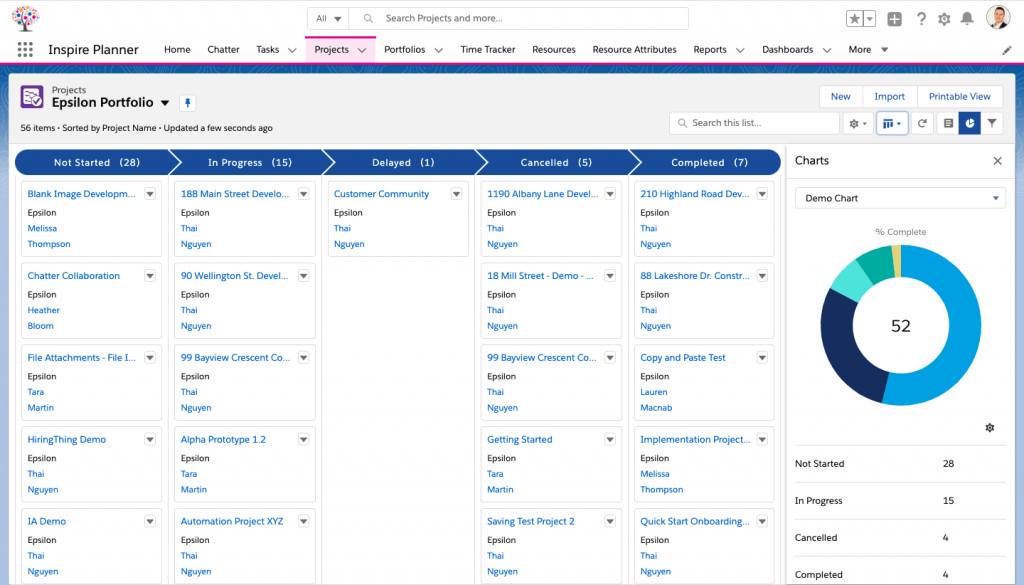
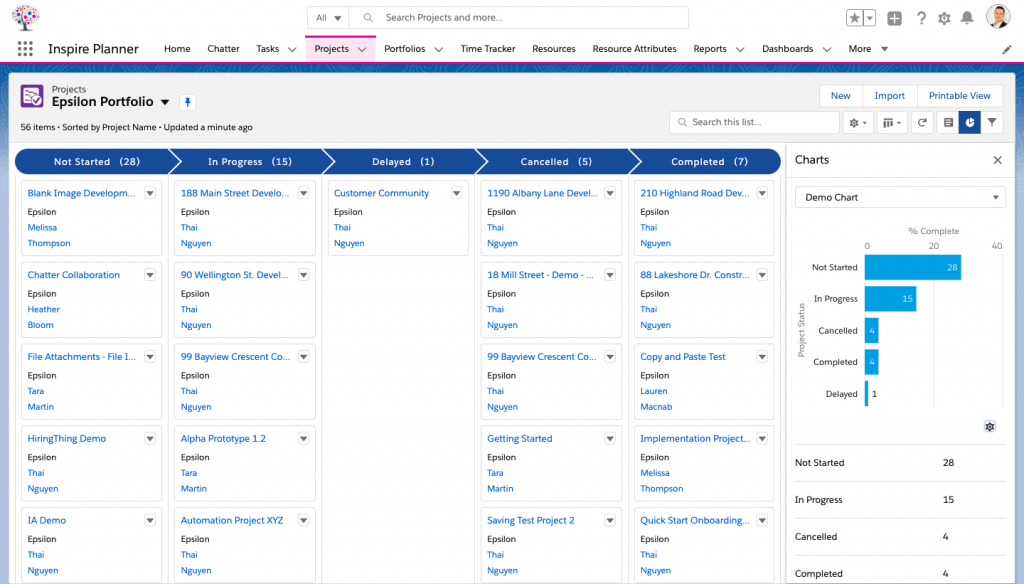
You can also utilize different types of Charts in Inspire Planner in order to create a mini project dashboard for yourself, giving you a nice high-level overview.
Donut chart of Inspire Planner projects:
Horizontal chart of Inspire Planner projects:
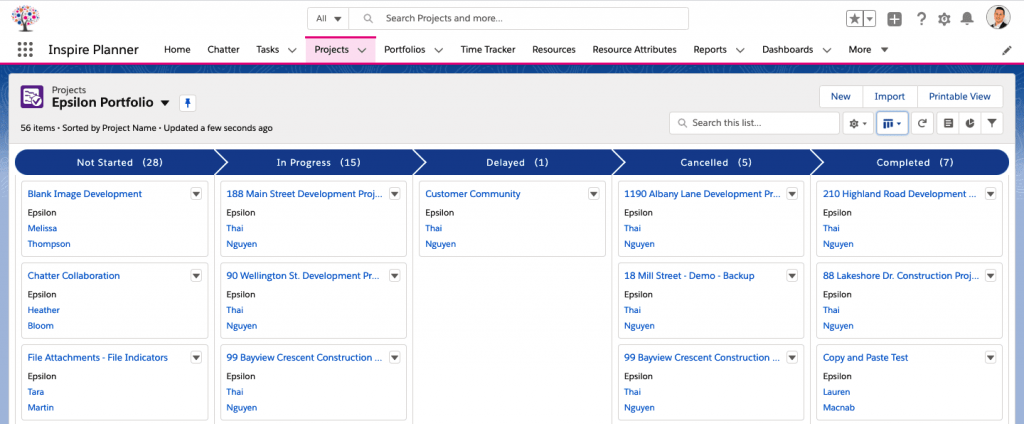
Salesforce List Views: Kanban View
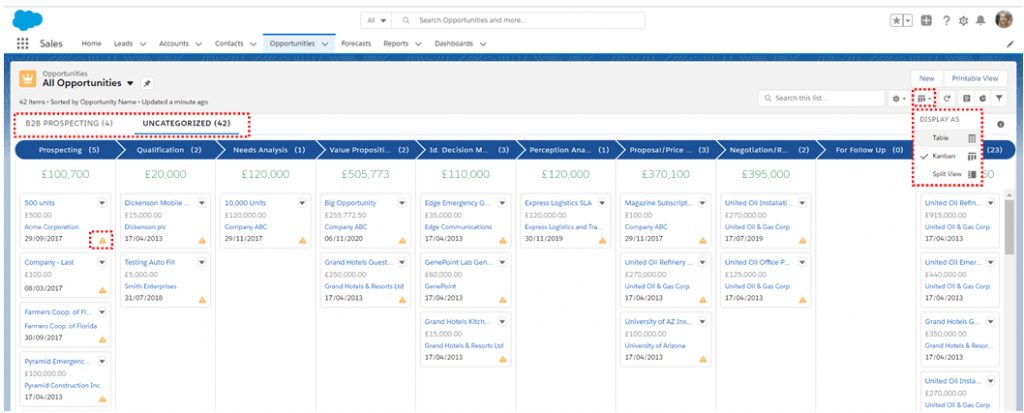
“Kanban View” gives you a visual summary of your data, whilst enabling you to keep things moving by dragging and dropping records so they move through your processes. “Kanban View” is particularly useful for opportunities as you can see the count and sum of opportunities per Stage and move records through the sales process.
“Kanban View” isn’t limited to opportunities though, it’s available for most objects, including Projects and Tasks in Inspire Planner.
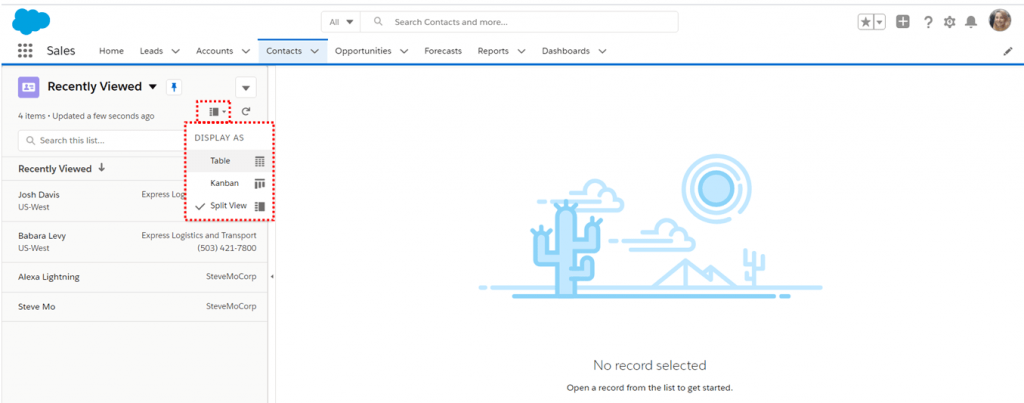
1. With your list view selected, click “Kanban View” from the Display As dropdown menu
2. Record Types will be displayed on different tabs
3. Move a record to the next column by dragging the card
4. Opportunity “Kanban View” will display alerts containing tips on how to keep the deal moving forward
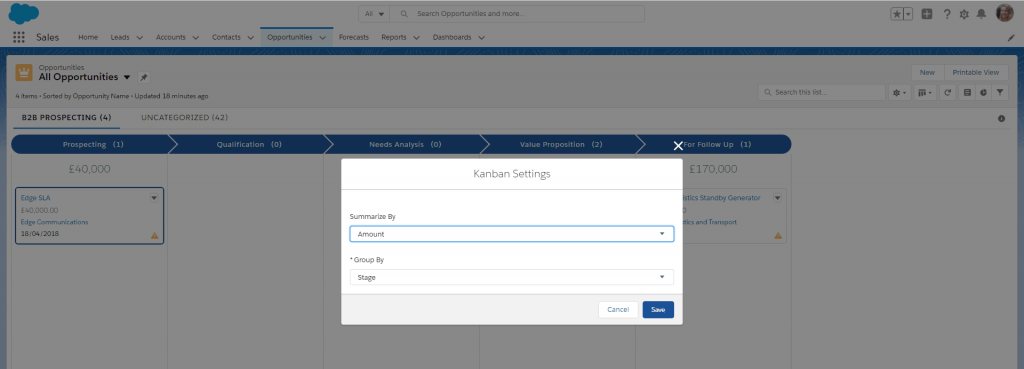
5. Select the gear icon and then Kanban Settings to change the grouping e.g. group by Stage and the summarised field e.g. Amount
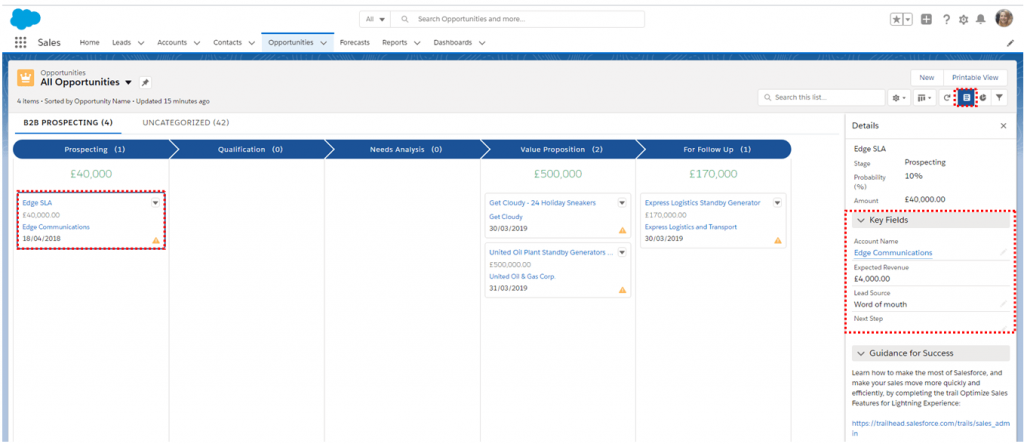
6. Click the Details/Hide Details icon to see additional information such as Guidance and Key Fields – Key Fields are available for inline editing
While managing your projects in Inspire Planner, the app lets you define a layout if you’d like. For those of you who prefer more of the agile work type, Kanban view of projects and tasks might be the most convenient layout to keep your work moving.
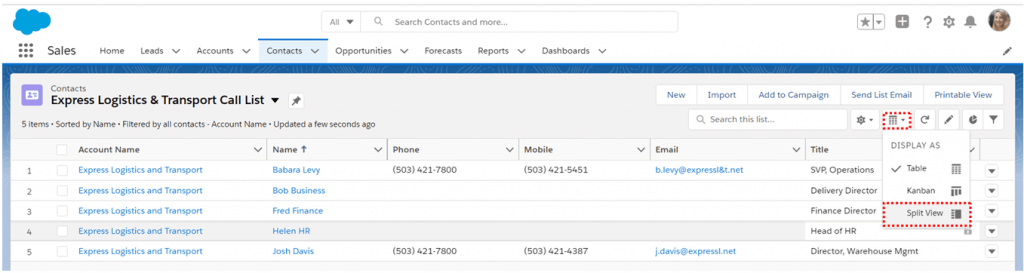
Salesforce List Views: Split View
Previously only available with console navigation style, from the Salesforce Summer ‘20 release, all users can choose “Split View” when using Salesforce list views, enabling you to see a list and a record side by side. This is ideal for anyone who works with lists of data such as call lists. “Split View” is a great time-saver, reducing the need to navigate back and forth between records or tabs.
1. With your list view selected, select “Split View” from the Display As dropdown menu
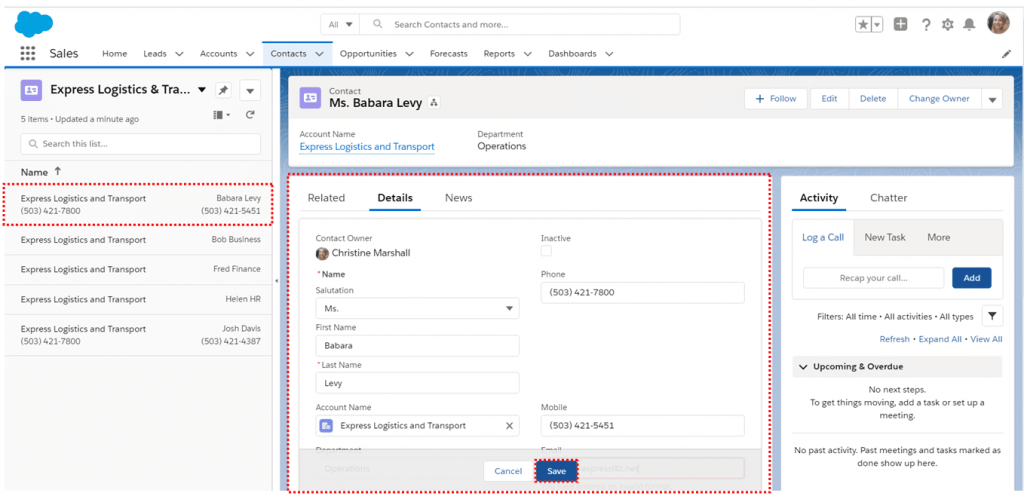
2. Select a record from your list view to view the record on the right-hand side
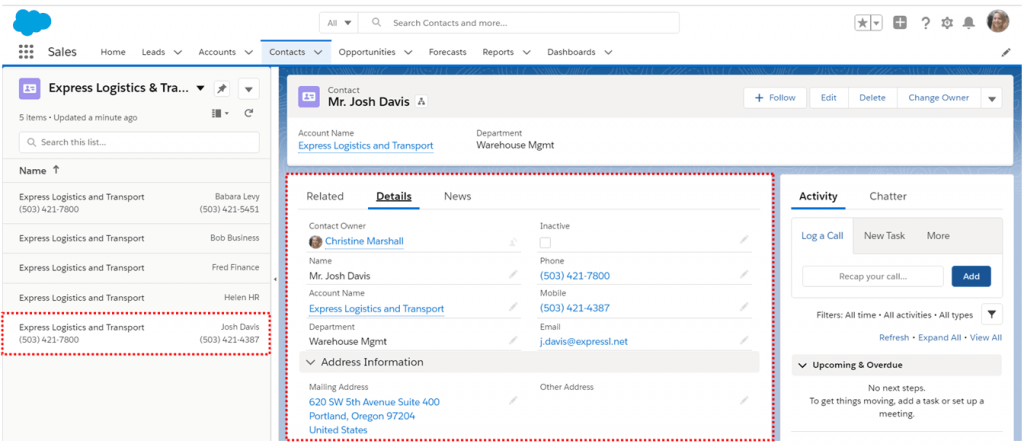
3. You can edit a record without leaving your list view
4. Collapse or open the list view at any time by clicking the arrow
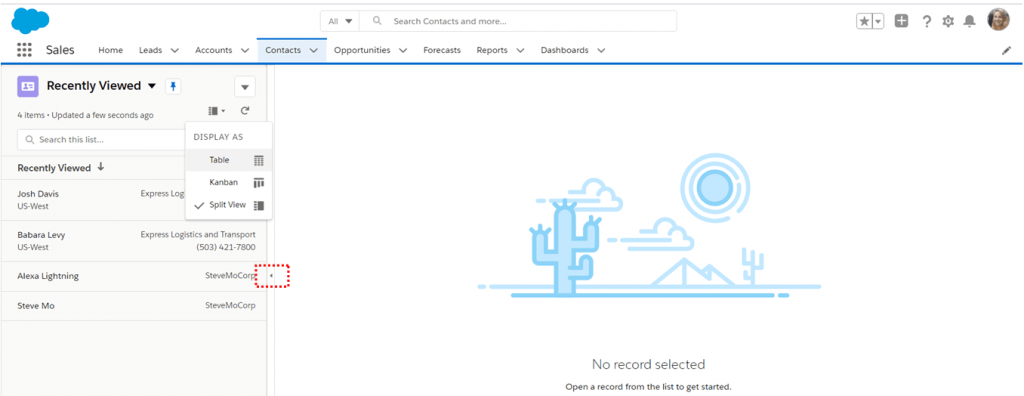
5. Navigate to a different display option such as “Table View” or “Kanban”
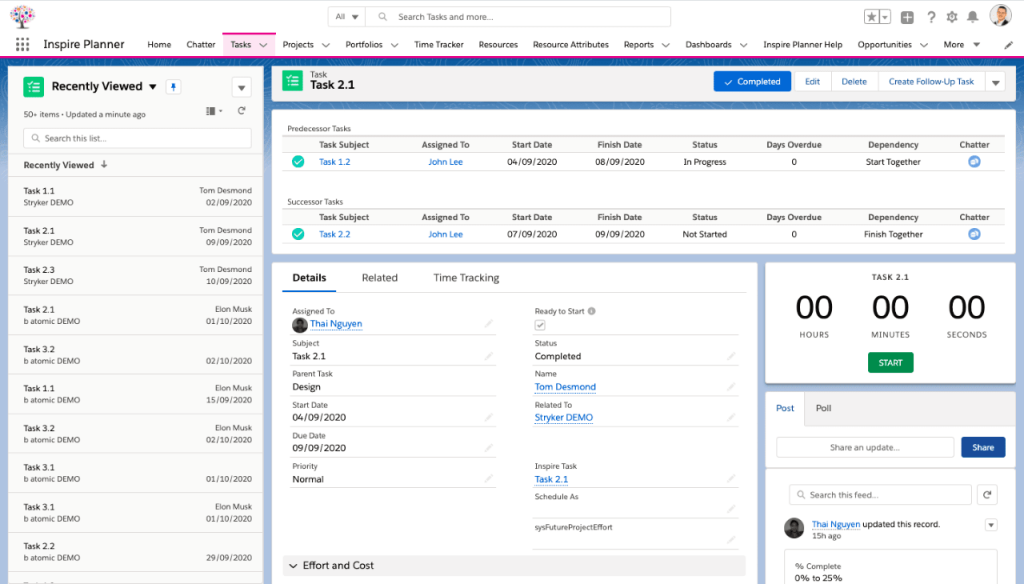
In Inspire Planner, the Split view is very useful while working on your tasks. This native project management app syncs with your Salesforce tasks, which are automatically created when assigning tasks to your users or contacts. Your projects are then seamlessly updated when Salesforce tasks are completed. Therefore, you can easily work through your tasks using the “Split View” in Salesforce list views.
Furthermore, the team at Inspire Planner has enhanced the collaboration aspect of the task environment for the project team members. For example, you can communicate with your colleagues through Chatter directly from this view and log time against your tasks. You can also see Predecessor and Successor components that display exactly what tasks you are waiting on based on the predecessors and what status is the dependency type. Similarly, you can see all the successor tasks that are waiting on you to finish before others can start their tasks and who you are impacting.
Even if you don’t have access to the project, you clearly understand how you are integrated into the project and what things depend on you. It also gives your team full transparency and full accountability in terms of what they need to do and how they are impacting the project.
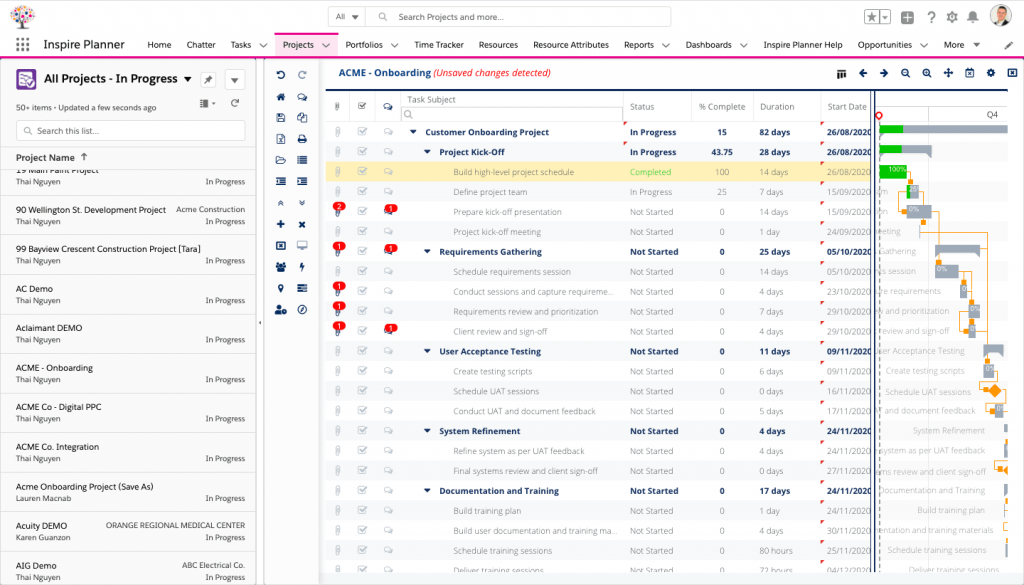
If you use the Split view on the Projects level, then the app would let you quickly switch between your projects, see a preview of your tasks and Gantt chart, and even edit the project directly from this interface, all in one screen and without opening a specific project separately.
Pinned List Views
Now you’ve created some amazing Salesforce list views, don’t forget to pin your favorite or most frequently used! Pinning a list view is a great way to improve navigation and reduce the number of clicks needed to get to the information you need.
1. With your list view selected, click the pin icon, you’ll then see a success message in green
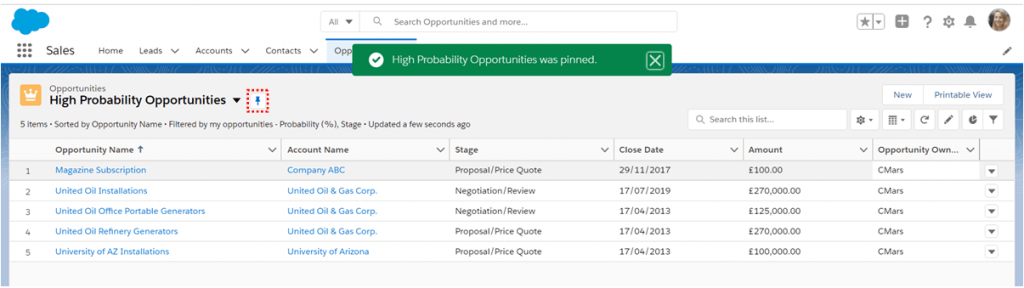
If you choose not to pin a list view, every time you navigate to a tab, you will see your Recently Viewed list view by default.
Favorite a List View
You liked the pinned list view, didn’t you? What if you have a few key Salesforce list views you need frequent access to?
You can add Salesforce list views to your Favorites; Favorites can be accessed from anywhere within Salesforce with two clicks! Now that really is easy navigation.
1. With your list view selected, click the star icon in the top, right-hand corner of the screen

2. Retrieve your Favorites from anywhere in Salesforce by clicking the dropdown arrow next to the star icon

Optimize Salesforce List View Performance
Salesforce list views are designed to be an efficient, speedy way to visualize your data so be sure to optimize your list view filters to get the best performance.
Key considerations:
- Salesforce list views only display 2000 records – if your list view returns over 2000 results, performance will be affected (e.g. slow)
- Only return the necessary data by adding filters
- Use the EQUALS operator instead of the CONTAINS operator
- Use the AND statement instead of the OR statement
- Only display fields you need to see
Salesforce List Views: Housekeeping
Just like Reports and Dashboards, Salesforce list views have a habit of getting out of control if not looked after properly.
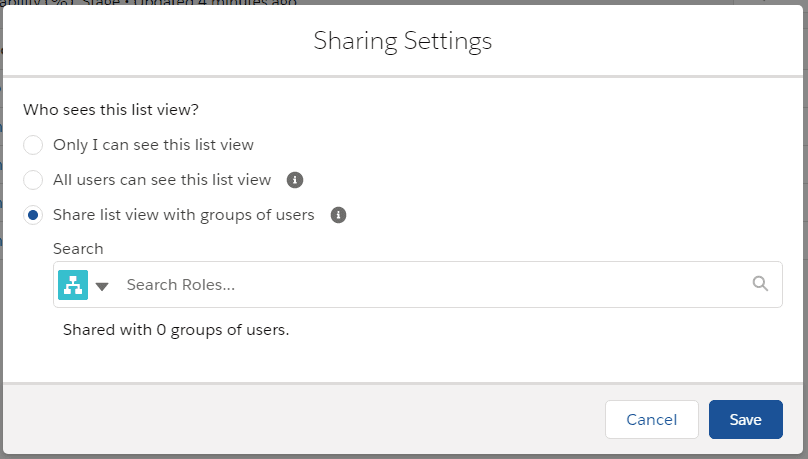
When creating a list view you can select who to share the view with. Educate your users to choose “Only I can see this list view” or “Share this list view with a group of users”.
“All users can see this list view” should be used sparingly and only when absolutely necessary!
Conclusion
In this article, we’ve seen how powerful Salesforce list views can be, instantly empowering you and your users to access, visualize, and analyze data. If you’d like to learn more or gain some hands-on practice then check out Trailhead’s Create and Customize list views module!

About the author
Christine Marshall is a 4x certified Salesforce Administrator and Salesforce MVP.
A regular speaker at Salesforce events, she leads the Bristol Salesforce Admin user group, mentors for Salesforce Supermums.
Christine also runs a Salesforce blog called The Everyday Admin.