Salesforce Permission Sets: A Guide to Streamlining User Access
Salesforce
A recent statistic states that 90% of Fortune 500 companies in the US work with Salesforce in 2024. Managing user access in such a widely used platform is crucial for maintaining security and optimizing productivity. However, it can become challenging as an organization scales. Relying solely on traditional roles and profiles might not offer the necessary flexibility to address evolving requirements. This is where Salesforce Permission Sets come into play.
This guide will discuss Salesforce Permission Sets and how to work with Permission Set Assignments efficiently. Mastering these tools will allow you to manage user access more flexibly and precisely.
Understanding Salesforce User Roles and Profiles
Roles and profiles in Salesforce indicate the visibility and actions that users can perform within the platform. Roles manage who can see data at the organizational hierarchy level. At the same time, profiles handle the permissions that define what actions users can take on the data they access.
- Roles: These are hierarchically structured, allowing organizations to manage data access vertically. For instance, a manager would have access to all records owned by their subordinates, while subordinates can only view their records.
- Profiles: Profiles are assigned to users as a baseline for their permissions within Salesforce. This includes permissions for objects, fields, and functionalities such as running reports or accessing specific apps.
To learn more about the differences between roles and profiles, we recommend you check out this Salesforce Ben guide.
Limitations of Profiles
Profiles are indispensable in defining baseline access, but they also have limitations. Managing user access using only profiles can become increasingly cumbersome as organizations grow and their needs become more complex.
For example, creating a new profile for every combination of permissions often results in many profiles, making it difficult to manage and audit user access. This is where the need for additional flexibility arises, leading to the introduction of Permission Sets in Salesforce.
Discover the latest retirement updates on profiles and permission sets in this guide to learn more.
Introduction to Salesforce Permission Sets
Salesforce Permission Sets offer a more flexible and granular solution for managing user permissions. Unlike profiles, which are assigned to users in a one-to-one relationship, Permission Sets can be assigned to users without changing their profiles. This allows you to grant specific permissions based on the access users require without creating a new profile for each unique combination.
Key Benefits of Salesforce Permission Sets:
- Granular Control: Permission Sets provide detailed control over user permissions, enabling administrators to tailor access to specific functionalities or data.
- Flexibility: Permission Sets can be adapted as business needs change, with permissions assigned directly to users or through groups, making it easier to manage and modify user access.
Types of Salesforce Permission Sets
Salesforce offers various types of Permission Sets to address different use cases. The administrator should also consider these Salesforce Permission Set considerations.
- Standard Permission Sets: These provide predefined permissions for typical roles aligned with the permission set license associated with each role.
- Custom Permission Sets: Administrators can develop permission sets relevant to the organizational needs of the user’s activities and demands.
- Session-Based Permission Sets: Professionals grant functional access for a specific session duration, allowing temporary elevated permissions as needed.
- Integration Permission Sets: Organizations can modify specific permission types depending on the integration use case, ensuring appropriate access for each integration.
- Permission Set Licences: Permission Set Licenses are additional privileges of a user license that aim to expand the functionalities the user usually does not have under the primary license.
- Managed Permission Sets: These are installed from managed packages, including various permissions predefined by the package provider and identified by the package namespace.
For example, a Salesforce native project management app Inspire Planner already comes with four permission sets – “Inspire Planner Standard User – v1.12”, “Inspire Planner – Agile Project Management”, “Inspire Planner System Jobs (Running User) – BETA”, and “Inspire Planner – Lite User”. This way you don’t need to worry about setting up user access out-of-the-box.
Creating and Managing Salesforce Permission Sets
Creating a Permission Set in Salesforce is a straightforward process:
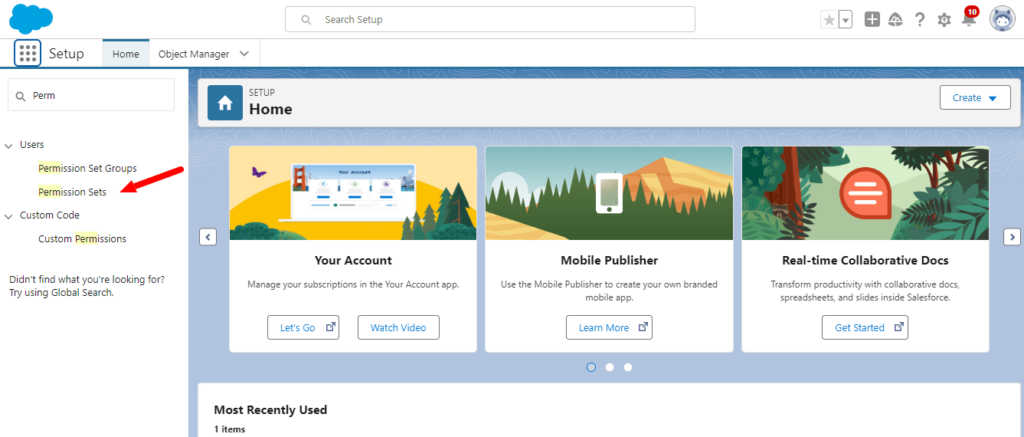
Navigate to Setup, enter “Permission Sets” in the Quick Find box, and click “Permission Sets” under Users.
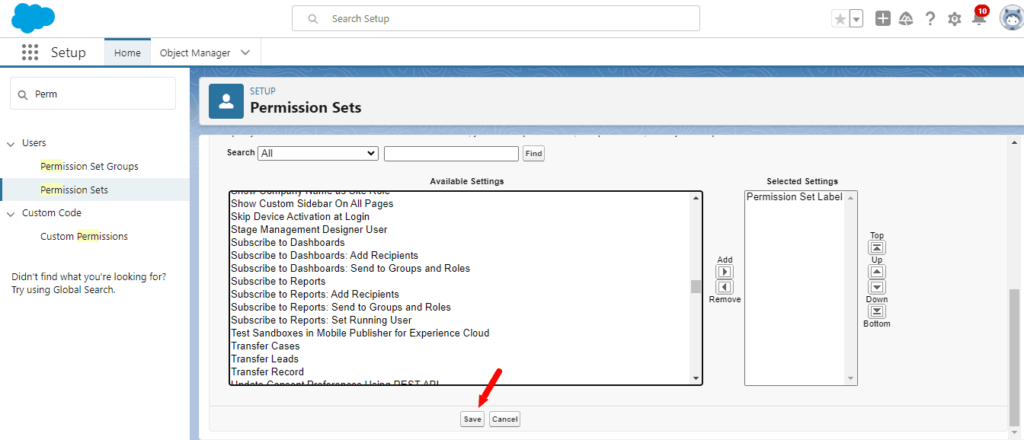
Click on New to create a new Permission Set. Define the Label and API Name for the Permission Set.
Set the License (optional) to associate the Permission Set with a specific feature license.
Save the Permission Set.
Assigning Salesforce Permission Sets to Users
Once a Salesforce Permission Set is created, it can be assigned to users individually or in bulk:
Go to the Permission Sets page and select the desired Permission Set.
Click on Manage Assignments.
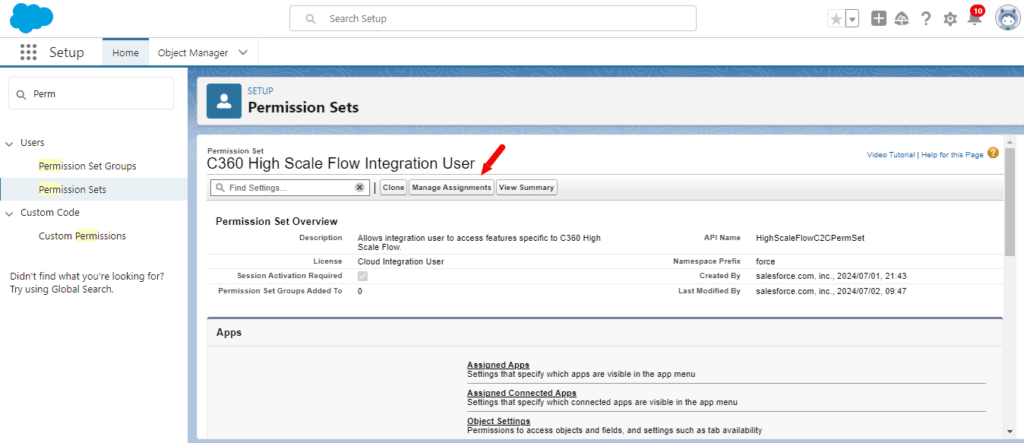
Choose Add Assignments to select users and assign the Permission Set.
Select users or groups by searching for individuals or predefined groups.
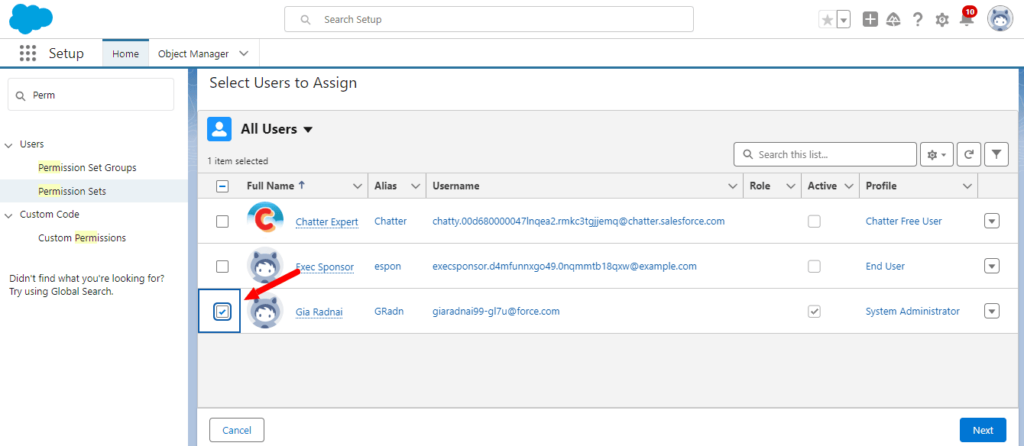
Click “Assign” to apply the Permission Set to selected users or groups.
If you need more help, you can look at this Salesforce guide.
4 Best Practices for Managing Salesforce Permission Sets
Here are 4 best practices for managing Salesforce Permission Sets:
- Organize Permission Sets, grouping related permissions, to prevent clutter.
- Keep the number of Permission Sets to a minimum by reusing and combining existing ones wherever possible. Periodically clean up unused or duplicate Permission Sets to maintain efficiency.
- Review Salesforce Permission Sets and their assignments to match your users’ roles and responsibilities.
- Remove unused or deprecated Permission Sets to decrease security risks and ensure the system remains clean and organized.
Learn more tips on how to work with Salesforce Permission Sets in the following article.
Advanced Techniques for Streamlining User Access
Here are 3 advanced techniques for streamlining your user access:
Combining Salesforce Permission Sets with Profiles
To those unfamiliar or unaccustomed to Permission Set Groups, the following are the key benefits of these Models:
- Simplified Permission Management: Instead of providing users with many individual Salesforce permission sets, they can be grouped in a single Permission Set Group containing all the required permissions. This also reduces the complexity of granting user rights and wrongs since users not required to use the system for their duties are eliminated.
- Improved Efficiency: Combining the Salesforce permission sets makes setting permissions easy since they are grouped in smaller sets. This not only saves time for the administrators but also mitigates the risks of having wrong explicit permissions assigned, which may create vulnerabilities in security or lead to inefficiencies in operations.
- Enhanced Flexibility: Permission Set Groups are slightly more flexible regarding permission management than Permission Sets. For instance, if a new Salesforce Permission Set for an individual role is required, it will simply be added to the Permission Set Group related to the role being performed by the users, and all the users performing this role will automatically be provided with the new permissions.
Creating a Permission Set Group
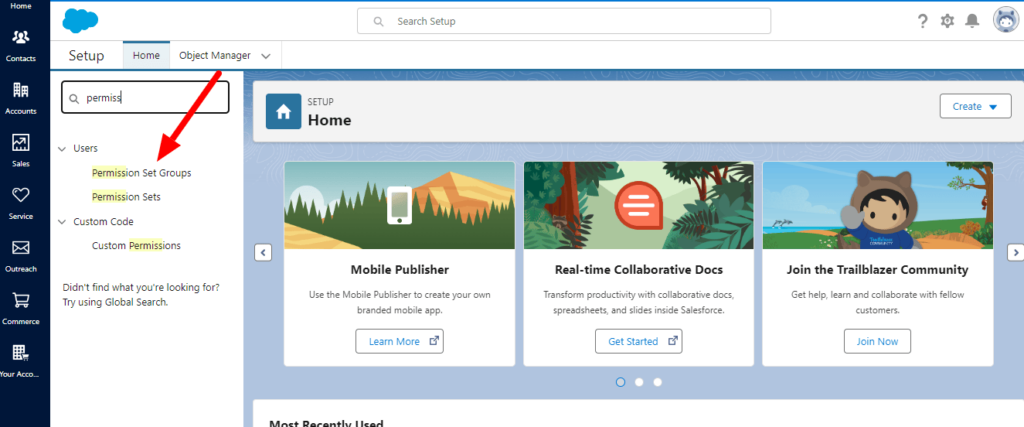
In Salesforce, go to Setup and enter “Permission Set Groups” in the Quick Find box. Click on the Permission Set Groups link.
Create a New Permission Set Group: Click the “New Permission Set Group” button. You’ll be prompted to enter a name and description for the group. Make sure the name is descriptive and reflects the role or function the group will serve.
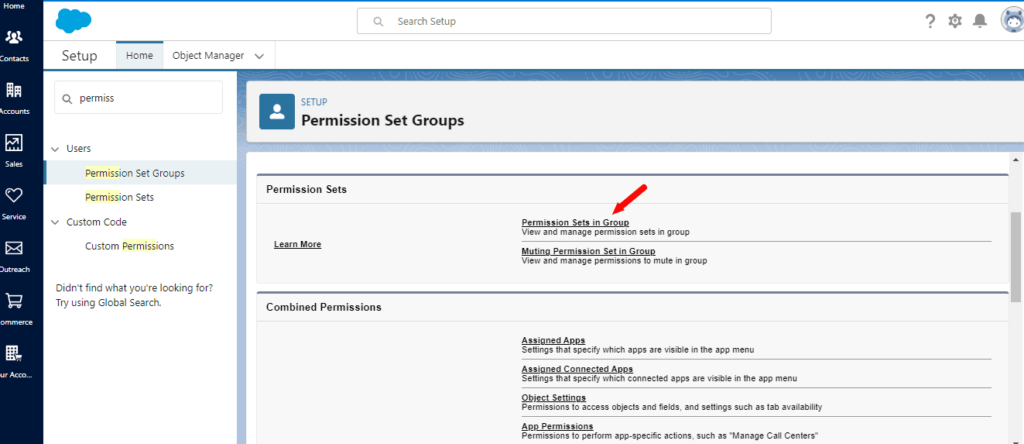
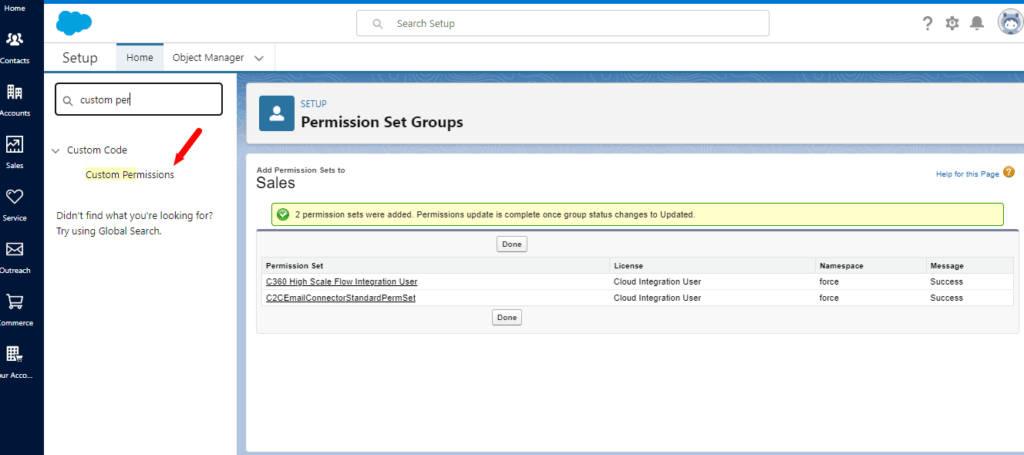
Add Salesforce Permission Sets to the Group: You can add individual Permission Sets once the group is created. Click on the “Permission Sets in Group” section and select “Add Permission Sets.” Choose the relevant Permission Sets that you want to include in the group.
Review and Save: After adding the necessary Salesforce Permission Sets, review the group to ensure it includes all the required permissions. Click “Save” to finalize the group.
Managing Salesforce Permission Set Groups
To manage Permission Set Groups, follow the following best practices:
- Assigning Permission Set Groups to Users: After creating the Permission Set Group, it can be assigned to users like any normal Permission Set. Take one’s user profile, go to permission set, then permission set assignment, and include the Permission Set Group. This assignment gives the user all the permissions in the group.
- Modifying Permission Set Groups: To modify a Permission Set Group, you must navigate back to the Permission Set Groups part of Setup, select the desired group, and modify it accordingly. Additional or fewer Permission Sets can also be included as deemed necessary.
- Using Muting Permission Sets: Salesforce also has some of the “Muting Permission Sets” features in the Permission Set Groups level. This feature notably lets you turn off certain permissions for a certain group without altering the real-time Permission Sets. This is valuable as it means you can give almost all permissions in a group but say no to some of the permissions for some people.
- Auditing and Reviewing: Permission Set Groups must always be audited to see if they define the current usage profile of the users. Access and review the Permission Set Groups established in Salesforce using the reporting functionality and ensure that the correct users are assigned within the correct Permission Set Groups.
- Cloning Permission Set Groups: If a new permission set group needs to be generated like an existing one, one can clone the Permission Set Group as the base. This enables the replication of the permissions and then tweaks them to avoid creating new ones from scratch and ensure conformity.
Leveraging Custom Permissions
Custom Permissions allow administrators to define permissions for specific functionalities not covered by standard permissions.
Creating Custom Permissions:
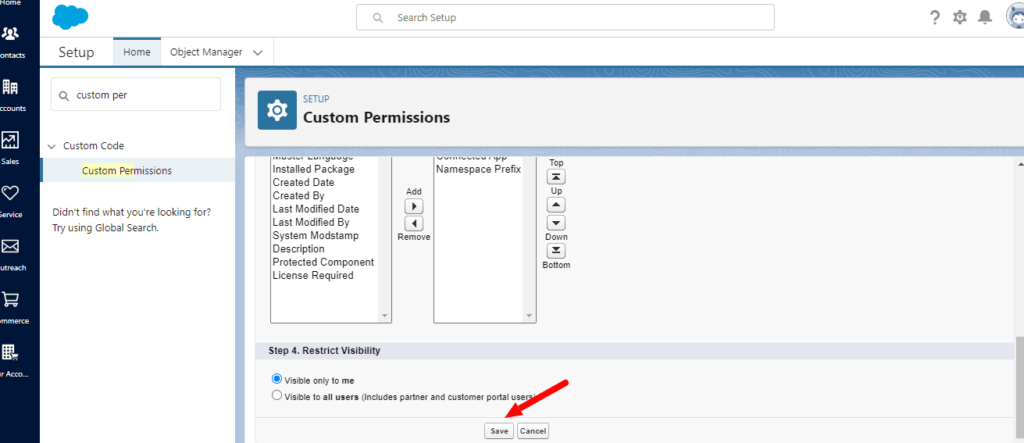
Navigate to Custom Permissions: In Salesforce, go to Setup and enter “Custom Permissions” in the Quick Find box. Click on the Custom Permissions link.
Create a New Custom Permission: Click the “New Custom Permission” button. You will be prompted to enter a label and API name to obtain permission. The label should clearly describe the functionality or feature that this permission controls.
Save the Custom Permission: Once you’ve entered the necessary details, click “Save.” Your Custom Permission can be used in Permission Sets or other Salesforce features like validation rules, flows, and Apex code.
Using Custom Permissions with Salesforce Permission Sets
When we speak of Custom Permissions, the only way that Permission Sets can be used is under the following conditions:
- Assigning Custom Permissions to Permission Sets: Custom Permission can be used in Permission Set, which has been explained; Permission Set is selected where you want to make the changes. Finally, under the “Custom Permissions” tab, click ‘Edit’ the custom permission you created earlier should appear in the list. Once more, click on Save the Permission Set button to make the changes.
- Assigning Permission Sets to Users: After a Custom Permission has been added to a Permission Set, users with the added Permission Set can be included as usual. Those users in the named Permission Set will now get the particular access or feature toggled by the Custom Permission.
- Using Custom Permissions in Validation Rules, Flows, and Apex: Custom Permissions can be called in Salesforce using declarative and programmatic features. For example:
- Validation Rules: Validation rules are generally used in the system to make certain validations optional for some user groups or specific values of certain fields; this can be achieved by using Custom Permissions in validation rules.
- Flows: Custom Permissions in Flows should specify whether the user can move forward in certain flow paths or when performing given actions.
- Apex Code: Custom Permissions can also be utilized in Apex code, where developers decide whether or not to perform specific logic based on the values of a Custom Permission.
Examples of Scenarios Where Custom Permissions Are Useful
Scenario: Your organization has built a custom feature for Salesforce that should be restricted, for example, to a specific number of users, such as senior account managers, in your case, with the “VIP Customer Management” feature.
Solution: Design a new Permission called ‘Access VIP Management.’ The new Permission should be included in a Permission Set granted to only a few senior Account Managers. Only the selected users can manipulate all the feature’s related operations.
Conditional Validation Rules
Scenario: You use a validation rule to set up data entry requirements. However, under specific conditions, you must exclude some users from this rule.
Solution: Develop a Custom Permission termed “Bypass Validation. ” Empower the validation rule implemented to check for this Custom Permission and permit users with such permission to BYPASS the rule if it is desirable.
The importance of limiting access to new features during rollouts Sometimes, organizations want to release powerful new features to the public at one time to increase their market share.
Scenario: Your organization is implementing it in stages, with different teams implementing the new feature in parts. You would like to be able to decide who has access during each stage of the rollout.
Solution: For the new feature, create a new permission like ‘Access New Dashboard.’ With the implementation of this feature, you are supposed to assign it under a permission set. This means you determine how people systematically access certain features when rolling it out.
Locking Information
Scenario: You have one or more fields with material that should be seen only by config approvers or some other limited group.
Solution: These fields should be secured by a Custom Permission, such as “View Sensitive Data.” Provide this permission in a Permission Set that is available only to the compliance team.
Tools for Auditing and Monitoring User Access
Salesforce offers several out-of-the-box options for user access auditing, including Field Audit Trail and Setup Audit Trail. Still, third-party tools with more features are provided, such as reporting on access logs and alerting.
Field Audit Trail
The Field Audit Trail is a very effective feature for tracking modifications made at core levels. In addition to the usual field history tracking, it allows storing field history information for up to 10 years. This feature is most helpful to organizations that may need to retain large volumes of data—especially if they need to retain such data for compliance reasons.
Use Cases: A Field Audit Trail is perfect for tracking significant data modifications in organizational, PII, and financial records. It aids in identifying unauthorized access to and alterations to such data, which is important during audits or investigations of such occurrences.
Setup Audit Trail
The Setup Audit Trail captures all the changes made in the Salesforce setup, such as profiles, permission sets, workflows, etc. It keeps records of the last six months of setting changes and the changes’ who, what, and when details.
Use Cases: Setup Audit Trail is one of the most useful features for monitoring administrative changes as an administrator. An administrator would be able to know when any of the users’ permissions, configurations, security settings, etc., were altered. This is particularly useful in support, where you have a problem to solve, need to confirm compliance, or work to maintain the stability and security of the network.
Login History
The Login History tool contains information on all user attempts to log into Salesforce, including IP address, time of login, and success or failure of the attempt. This is useful in detecting insecure or forbidden login procedures.
Use Cases: It can be seen from the Login History list that the instances of Login History checked per day and the type of login – normal, remote, or failed – can help security identify perceived security threats that it could not otherwise notice; these include instances of logins(originating) from different geographical locations and multiple failed login attempts from the same login ID which indicates that someone could be attempting to guess the password. It also ensures that users connect to Salesforce only from known devices and networks.
Third-Party Solutions
Salesforce also has built-in audit trails that are pretty good. Still, when it comes to third-party applications, one may enjoy more features from the auditing point of view, such as extra reporting, real-time monitoring, and alerts. These tools include built-in dashboards, enhanced reports, and the feature to identify more specific hierarchal shifts, which work in favor of monumental or heavily governed businesses.
Some recognized third-party apps are Salesforce Shield, Fair Warning, and Own Backup. These apps complement Salesforce’s existing audit trails by providing better data security, automated reporting on compliance issues, and even proactive threat prevention.
Use Cases: Such solutions are most effective when the organization’s Salesforce is complex or governed by strict compliance standards. They can offer more detailed and automated information than other methods, decreasing the time spent on audits and allowing more rapid response to potential security threats.
Best Practices for Monitoring Salesforce Permission Set Usage
Here are some best practices to follow:
- Regular Audits: Users’ access should be periodically reviewed to identify the roles still assigned and the permissions no longer justified.
- Automated Alerts: Use alert facilities to message administrators whenever questionable events occur, such as login attempts and changes to system settings.
- Documentation: Pay close attention to documenting audit processes and results. This will help in internal governance, especially during external audits or while checking compliance.
- Training: Make sure that the people in your administration understand how these tools for auditing operate so you can respond to such concerns as soon as possible.
Final Thoughts
Managing Permission Sets in Salesforce is key to proper user management. It also assists administrators in adjusting user access control more precisely, meaning that users only have access to the areas in the system that allow them to do their responsibilities while denying them access to other parts considered sensitive.
With the rapid and continuous change that has been characterized at Salesforce comes the constant change in user access management. To be updated and, therefore, to be able to change the Salesforce Permission Sets according to the best practices, administrators have to ensure that they know when new features are released.
In this manner, administrators can be confident that their organization is protected and utilize Salesforce effectively.